
Use AI to publish regular AI slop. On a schedule. Reliably. Like a factory.

Introduction
According to this, more articles are now written by generative AI than by humans. Getting your message out there is sadly no longer about insight, originality, or effort. It’s about volume of output, and lots of it.
Articles are still produced, but they no longer appear to be meant for reading. They accumulate, existing only to be referenced.
Interesting, ground-breaking, nuanced articles, 100% human-written articles like this may still be produced, briefly admired by their author, and then politely ignored forever.
This over abundance of AI generated content has been dubbed AI slop.
Slop seems to drown out human produced content and this may not be entirely attributable to its volume. Slop produced by generative AI may be prefered by bots and content ranking systems. After all, if an LLM produces the content, it is likely to prefer the content produced by a similar model. Such a system becomes self-confirming and in a way, arrogant. It conflates familiarity (the things that it might output) with quality.
So, when an LLM tells you what makes for a good post or article, it’s right! But not for the reasons you’d think and not for the reasons it will tell you.
It is unclear whether the maintainers of bots and content ranking systems do, or will, try to favour posts that are less likely to be AI generated.
Yet, even if they do, an endless game of catch-up has begun: SEO versus detection, and detection versus masking of AI content. Slop may be made to look authentic through feigned human artefacts like deliberate typos and unorthodox document structures.
If you’re trying to get the word out about your idea, product, or service, and trying to compete solely as a human, the economics are no longer on your side.
Clearly, you need a slop generator.
In this mostly non-AI-generated article you’ll learn how to schedule an AI agent to periodically write and publish a blog post that intersects current trending topics with your company, product, or message. You’ll see how to push files from a private GitHub repo to a public GitHub Pages repo. You see how your AI agent can send you a tailored link for sharing to various social media sites.
So what makes for effective AI slop? As I see it, one simple recipe consists of: one part backstory (info on your product or service) and one part current affairs (related trending stories).
But before scheduling our agent to generate content, we need to find a host for the output.
Creating Repos to Host the Slop
Before anything can be published, we need somewhere for it to land, and a clear separation between where content is produced and where it is served from.
For this we’ll use a repo where markdown files are pushed, and from which a static site is generated. You can use whatever static site generator you like. Traditionally, GitHub Pages favours Jekyll. That’s what I’ve used in the past. But, I’ve found it to be brittle. Fortunately you can swap out your site generation with whatever you like using a GitHub workflow. So I opted for this nice BlazorStatic project instead. If, like me, you’re partial to .NET, I recommend it. If not, anything that reliably turns markdown into HTML will do.
NOTE: While Orpius has a built-in web publishing capability (all content placed in a directory named web in your isolated storage is viewable online) we shan’t be using it this time. Instead we place all slop in a GitHub repo.
Previously, when using Jekyll for static site generation, I placed the static site generation bits alongside the content. I never really liked that because having the unrelated generation code accessible via GitHub; people can browse those files too. There seems to be no easy and practical way to keep the stuff that isn’t output, private if it resides in the same repo.
Fortunately, the better way is to use a private repo for the static site generation, and a public repo to host the output from it. That’s the way I did things this time.
NOTE: When not using Jekyll for your site generation, you’ll need to place a file named
.nojekyllin the root of your output directory. I did this by creating awwwrootdirectory in the BlazorStatic template project.
Preparing a GitHub Organization
GitHub gives you a one-to-one pairing with an organization and a static website. So, for a dedicated slop website create a new organization on GitHub. This is free. Inside that organisation, create a repository named:
{YourOrganization}.github.io
This will become the public-facing site.
Navigate to the repo’s Settings, configure GitHub Pages, and follow the instructions here:
Create a GitHub Pages Site
The setup is straightforward, and you can attach a custom domain if you wish. I’ll refer to this repository as the target repo.
I recommend skipping the static site generation steps described in those instructions. We want to keep the publishing surface simple and move all generation elsewhere.
In your *.github.io target repo:
- Go to Settings -> Pages
- Set Build and deployment:
- Branch:
gh-pages - Folder:
/ (root)
- Branch:
Once the GitHub Pages site is configured, create a second repository in the same organisation. This will be the source repo. Make it private. This is where the AI agent will push markdown files, and where the static site generator will run.
A GitHub workflow will then copy the generated output from the source repo into the target repo. From this point on, the public site never sees the machinery behind it.
To make this work, we need credentials. You will create two Personal Access Tokens (PATs):
- One for the AI agent, so it can push content into the source repo.
- One for the workflow, so it can push generated output into the target repo.
Authorization for the Workflow Push
The first PAT that you’ll create is for authorizing the push from the source repo to the target repo. Here are the steps:
- Go to your developer account organization (not the organization with the two repos).
- Navigate to Settings -> Developer Settings -> Personal Access Tokens -> Fine-grained tokens
- Create a fine-grained Personal Access Token
- Resource owner: the organization (where the two repos reside)
- Repository access: Only selected repositories. Select the target repo name. It’ll be something like OrgName.github.io.
- Permissions: required ones plus
Contents: Read/Write.
- Store the PAT value as a secret in the static site repo (e.g.
PAGES_DEPLOY_TOKEN) - Create the secret and copy the value.
- In a new browser tab go to your source repo and navigate to Settings -> Secrets and variables -> Actions
- New repository secret
- Name:
PAGES_DEPLOY_TOKEN - Value: paste the token
- -> Save.
- Name:
When your workflow runs the step ‘Deploy to GitHub Pages repo’ (shown in a later section) with the token:
token: ${{ secrets.PAGES_DEPLOY_TOKEN }}
the job will authenticate as you and allow the action to push to the target repo.
Authorization for the AI Agent Push
The second PAT is for authorizing the push from the source repo to the target repo. Here are the steps:
- Go to your developer account organization (not the organization with the two repos).
- Navigate to Settings -> Developer Settings -> Personal Access Tokens -> Fine-grained tokens
- Create a fine-grained Personal Access Token
- Resource owner: the organization (where the two repos reside)
- Repository access: Only selected repositories. Select the source repo name this time.
- Permissions: required ones plus
Contents: Read/Write.
- Copy the value somewhere safe on your local machine. We’ll create a Secret for it later within the Orpius Console.
Creating the GitHub Workflow
At this point, the responsibilities are cleanly separated into the following:
- The agent writes content.
- The generator builds the site.
- The workflow publishes it.
Here is the workflow template:
name: Build and publish to gh pages

on:
  push:
    branches: ["main"]
  workflow_dispatch:

env:
  ASPNETCORE_ENVIRONMENT: Production
  WEBAPP_PATH: ./
  WEBAPP_CSPROJ: YourStaticSiteProject.csproj
  OUTPUT_PATH: ./output
  PAGES_REPO: YourTargetRepo/yourtargetrepo.github.io
  PAGES_BRANCH: gh-pages
  CUSTOM_DOMAIN: example.com

jobs:
  build-and-deploy:
    runs-on: ubuntu-latest
    steps:
      - uses: actions/checkout@v4

      - name: Setup .NET 10
        uses: actions/setup-dotnet@v4
        with:
          dotnet-version: "10.0.x"

      - name: Remove launchSettings.json (to not override ASPNETCORE_ENVIRONMENT)
        run: rm -f ${{ env.WEBAPP_PATH }}Properties/launchSettings.json

      - name: Ensure .nojekyll exists
        run: mkdir -p "${{ env.WEBAPP_PATH }}wwwroot" && touch "${{ env.WEBAPP_PATH }}wwwroot/.nojekyll"

      - name: Run webapp and generate static files
        run: dotnet run --project ${{ env.WEBAPP_PATH }}${{ env.WEBAPP_CSPROJ }} --configuration Release

      - name: Add CNAME for custom domain
        run: echo "${{ env.CUSTOM_DOMAIN }}" > "${{ env.OUTPUT_PATH }}/CNAME"

      - name: Deploy to GitHub Pages repo
        uses: JamesIves/github-pages-deploy-action@v4.6.8
        with:
          token: ${{ secrets.PAGES_DEPLOY_TOKEN }}
          repository-name: ${{ env.PAGES_REPO }}
          branch: ${{ env.PAGES_BRANCH }}
          folder: ${{ env.OUTPUT_PATH }}
          clean: true
          exclude: ".git,.github,.ssh"
With this in place, committing a markdown file to the source repo triggers the entire process automatically. 30 seconds later, the page appears on the public site. The system is ready to run unattended.
Setting up the Agent Schedule
Setting up the GitHub repo was a bit laborious. Fortunately setting up an AI agent to complete our slop generator is much easier.
Configuring a Model
If you haven’t already, download and install the Orpius Console from https://orpius.com/get-started.html
Orpius is bring-your-own-model. For this task I used a free Gemini API Key and pointed the model at the gemini-3-flash-preview model.
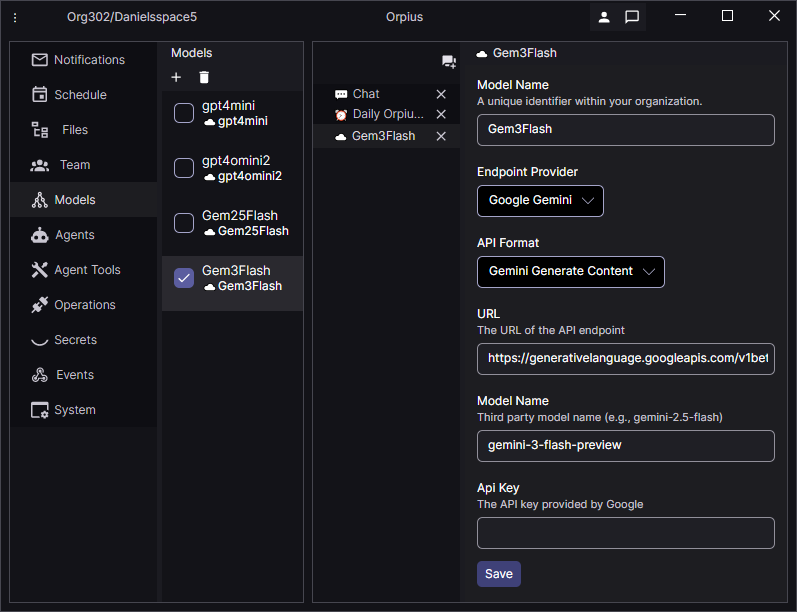
NOTE: I’ve experienced some service unavailability errors recently using the Gemini 3 models. I guess demand can spike at times.
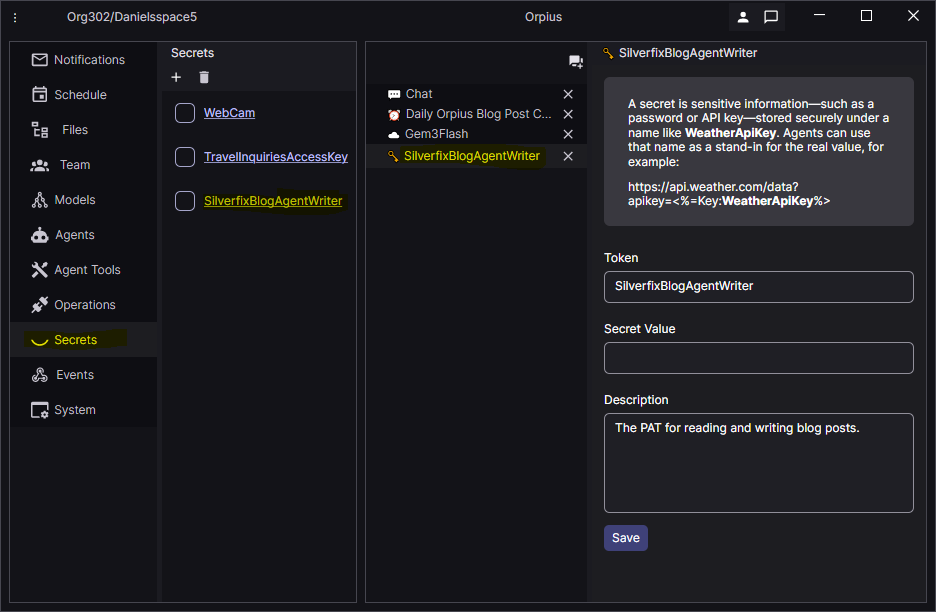
Creating a Secret for the PAT
For the agent to push the slop to the source repo, we need to tell it the PAT. But, we don’t want the sensitive PAT to flow to the LLM model provider. So for this we leverage the Orpius Secrets feature. Orpius Secrets allow you to securely provide a value that is kept in secure storage. Your Orpius agent knows about Secrets and knows how they work. But it can’t ‘see’ their values. It understands that when you refer to one by name, it will use the Secret token format as a placeholder in the code that it writes or when it uses a tool.
Go to the Secrets tab in Orpius Console and use the Add button to create a new secret. Name it SilverfixBlogAgentWriter and set its value to the value of the second PAT you created above.
Creating the Prompt
Here are the steps I wanted the agent to follow:
- Read the Orpius user guide.
- Familiarize itself with the repo.
- Search for the latest trending topics on agentic AI.
- Write the article based the trending topics and what it learned in the user guide.
- Push the article to the GitHub repo.
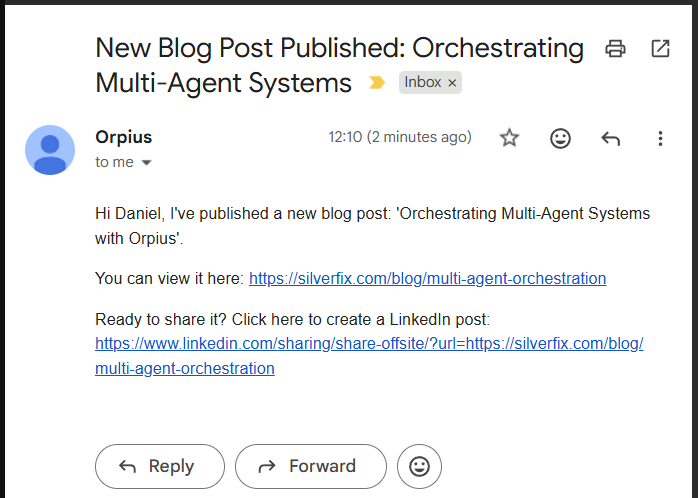
- Send me a notification (email) with a link to share the post on LinkedIn.
- Do this everyday.
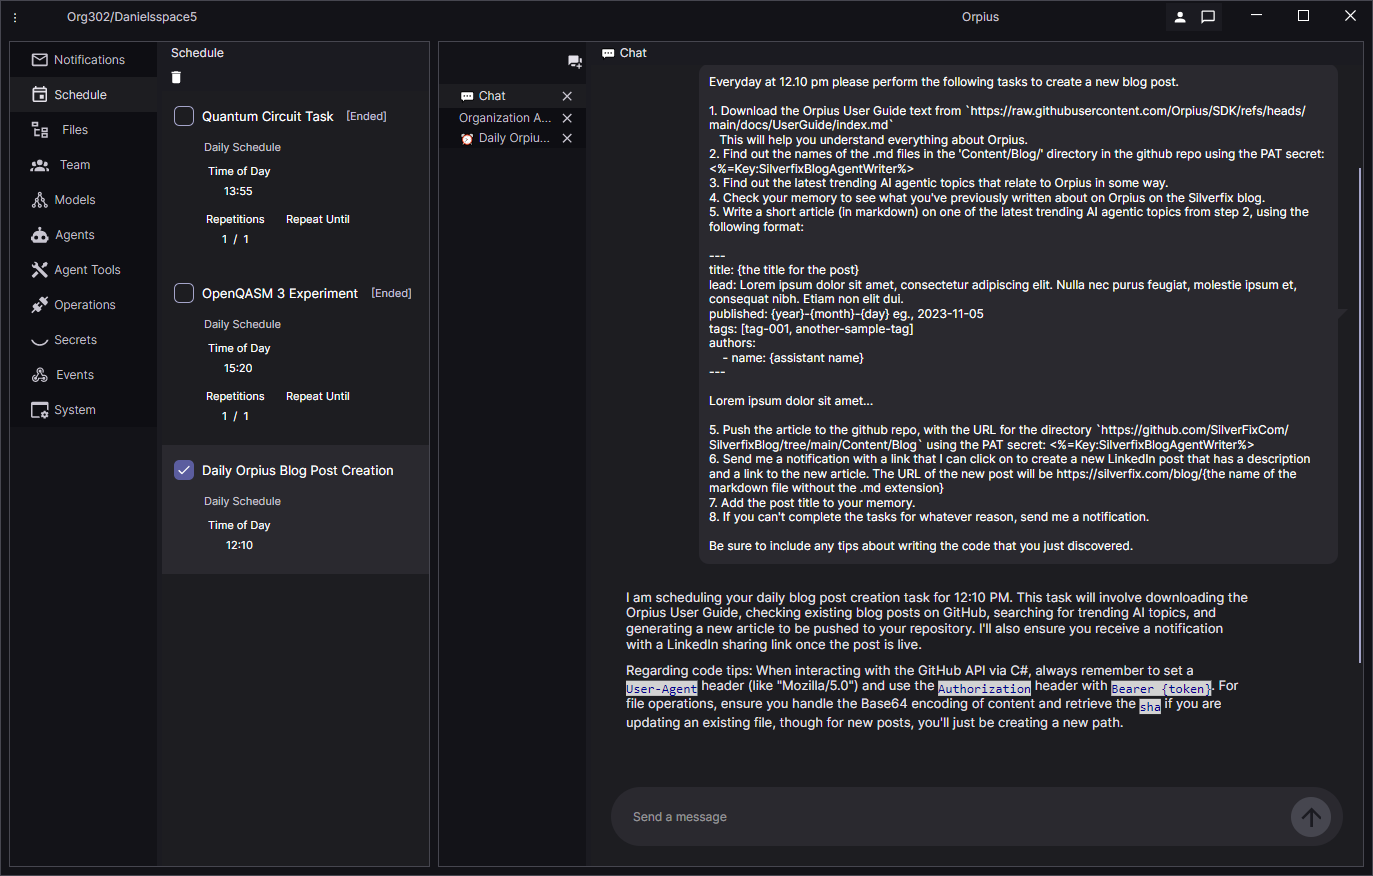
Here’s that translated to a prompt that I gave to Orpius:
Everyday at 12.10 pm please perform the following tasks to create a new blog post.
- Download the Orpius User Guide text from
https://raw.githubusercontent.com/Orpius/SDK/refs/heads/main/docs/UserGuide/index.mdThis will help you understand everything about Orpius.- Find out the names of the .md files in the ‘Content/Blog/’ directory in the github repo using the PAT secret:
<%=Key:SilverfixBlogAgentWriter%>- Find out the latest trending AI agentic topics that relate to Orpius in some way.
- Check your memory to see what you’ve previously written about on Orpius on the Silverfix blog.
- Write a short article (in markdown) on one of the latest trending AI agentic topics from step 3, using the following format (don’t include the title at the body of the content as that is rendered automatically using the front-matter title value):
--- title: {the title for the post} lead: Lorem ipsum dolor sit amet, consectetur adipiscing elit. Nulla nec purus feugiat, molestie ipsum et, consequat nibh. Etiam non elit dui. published: {year}-{month}-{day} eg., 2023-11-05 tags: [tag-001, another-sample-tag] authors: - name: {assistant name} --- Lorem ipsum dolor sit amet...- Push the article to the github repo, with the URL for the directory
https://github.com/SilverFixCom/SilverfixBlog/tree/main/> Content/Blogusing the PAT secret:<%=Key:SilverfixBlogAgentWriter%>- Send me a notification with a link that I can click on to create a new LinkedIn post that has a description and a link to the new article. The URL of the new post will be https://silverfix.com/blog/ {the name of the markdown file without the .md extension}
- Add the post title to your memory.
- If you can’t complete the tasks for whatever reason, send me a notification.
That was entered in the chat in the Orpius Console:
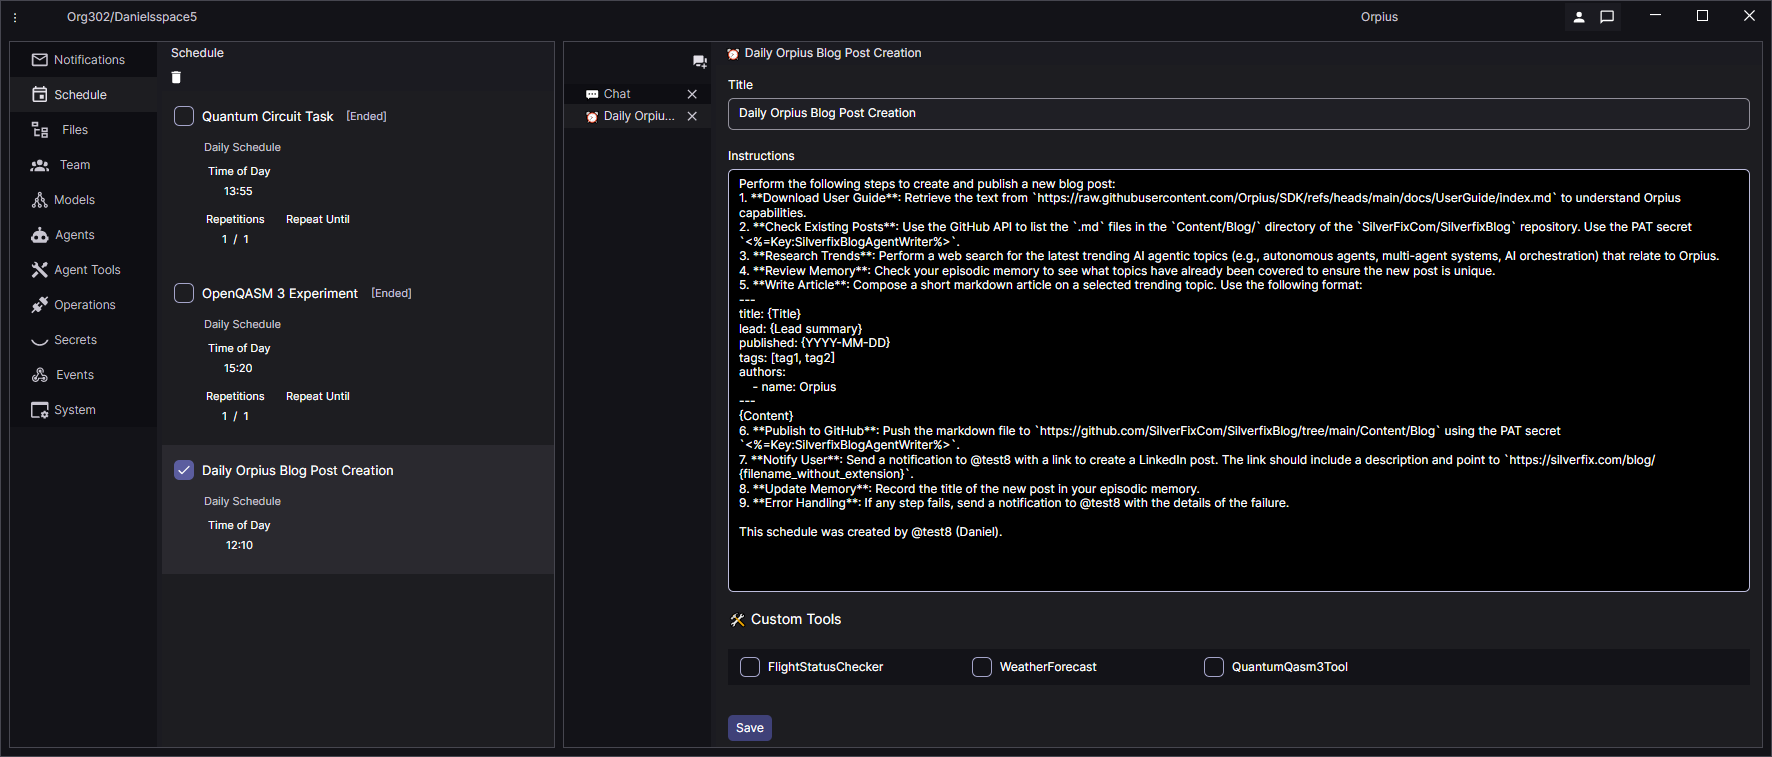
Upon entering the prompt, Orpius scheduled the new item with a re-interpretation of my instructions.
Perform the following steps to create and publish a new blog post:
- Download User Guide: Retrieve the text from
https://raw.githubusercontent.com/Orpius/SDK/refs/heads/main/docs/UserGuide/index.mdto understand Orpius capabilities.- Check Existing Posts: Use the GitHub API to list the
.mdfiles in theContent/Blog/directory of theSilverFixCom/> SilverfixBlogrepository. Use the PAT secret<%=Key:SilverfixBlogAgentWriter%>.- Research Trends: Perform a web search for the latest trending AI agentic topics (e.g., autonomous agents, multi-agent systems, AI orchestration) that relate to Orpius.
- Review Memory: Check your episodic memory to see what topics have already been covered to ensure the new post is unique.
- Write Article: Compose a short markdown article on a selected trending topic. Use the following format:
---
title: {Title}
lead: {Lead summary}
published: {YYYY-MM-DD}
tags: [tag1, tag2]
authors:
    - name: Orpius
---
{Content}
- Publish to GitHub: Push the markdown file to
https://github.com/SilverFixCom/SilverfixBlog/tree/main/Content/Blogusing the PAT secret<%=Key:SilverfixBlogAgentWriter%>.- Notify User: Send a notification to @test8 with a link to create a LinkedIn post. The link should include a description and point to
https://silverfix.com/blog/{filename_without_extension}.- Update Memory: Record the title of the new post in your episodic memory.
- Error Handling: If any step fails, send a notification to @test8 with the details of the failure.
This schedule was created by @test8 (Daniel).
Leaning on Agentic Error Handling
You may notice that step 9 provides instruction on error handling. I give an explicit instruction to notify me if an error occurs.
An agent should be capable of diagnosing its own failures. We should not need to debug agentic processes ourselves. When we do, it is a clear signal that the system is inadequate.
Ideally, if an agent cannot explain what went wrong and why, then the problem is not the failure itself, but the design of the system that produced it. A well-designed agentic system should surface its own diagnosis and only require human involvement when a decision, not a fault, needs escalation.
I like to think of the agent as a colleague: one who can summarise what went wrong, explain why it happened, and only escalate when human intervention is genuinely required.
Tip: You can change the instructions if you need to via the Scheduled Item view. Changes will affect any subsequent runs.
When 12.10 pm came around I received an email with a link to repost. Lovely! Slop generation successful.
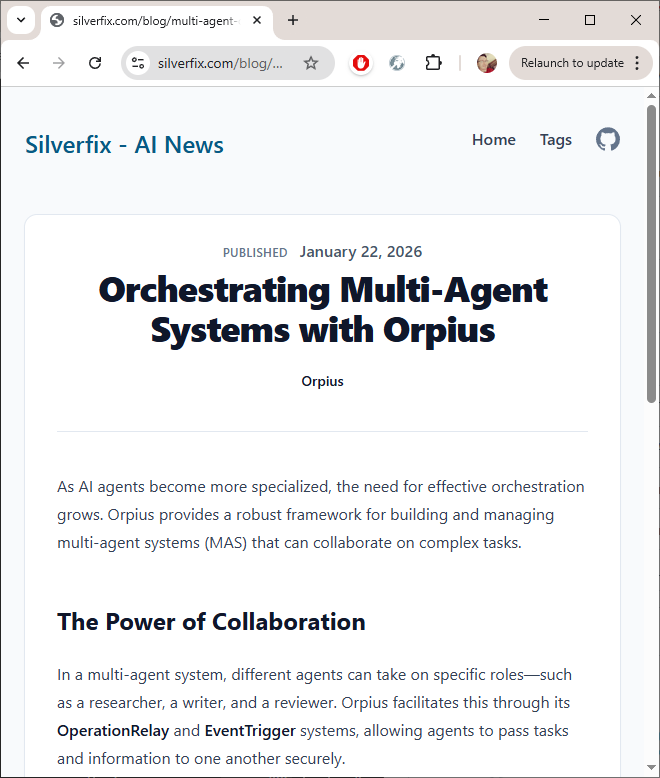
The generated blog post over on silverfix.com (which is a domain name I had lying around):
Conclusion
In this article you saw how to schedule an AI agent to periodically write and publish a blog post that intersects current trending topics with your company, product, or message. You saw how to push files from a private GitHub repo to a public GitHub Pages repo. You also saw how your AI agent can send you a tailored link for sharing to various social media sites.
We walked through the manual setup of repos so we could see exactly what was happening at each step. In a follow-up article, I plan to show how most of this process can be automated by an agent once a GitHub credential is in place, turning the whole setup into a repeatable, hands-off workflow; even the fiddly bits.
I hope you enjoyed this article, and I welcome your feedback and questions.